Somewhere in your RFQ process, someone will ask which is better for acrylic: CNC routing or laser cutting. It is the wrong question, and specs written around it cause real problems downstream. A drawing that says “laser cut all parts” can force a heat-affected edge onto a face that needs to be solvent-bonded. A spec that says “CNC only” can price fine interior lettering as if it needed a rotating tool small enough to carve it. The right question is not which machine wins — it is which features of your part each process serves, because on real production work the answer is routinely both.
Here is the routing logic we apply in our own shop, and the variables that actually decide it.
The physical difference that drives everything else
Every practical difference between the two processes traces back to how each one removes material.
A laser cuts by vaporizing a narrow kerf of acrylic along the cut path. Nothing touches the part. The beam leaves behind an edge that has been melted and re-solidified — glossy straight off the machine without any secondary operation — similar in character to a flame-polished edge, though the standard classifies it separately as Laser-Cut. That is the laser’s signature advantage and, as we will get to, also its signature constraint.
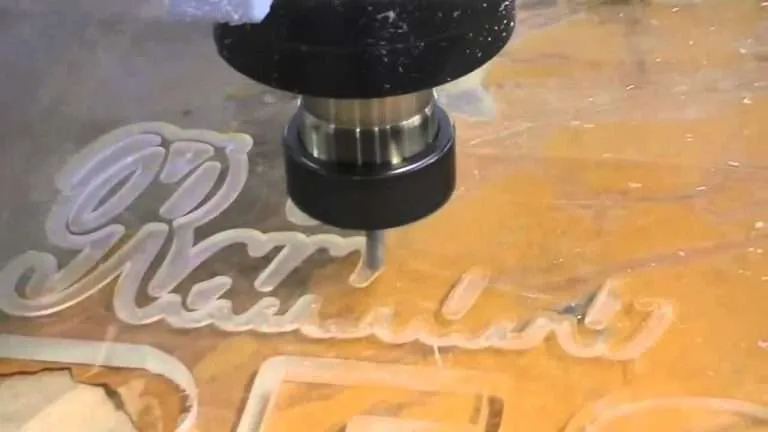
A CNC router cuts with a spinning tool. It is machining, in the same family as milling: the tool takes a physical path through the material and leaves a machined edge with fine tool marks. That edge is not glossy off the machine — and that is a feature, not a defect. A machined edge is the correct starting point for the full range of finishing operations in our Edge Finishing standard: it can be left as machined, sanded, flame-polished, buff-polished, or diamond-polished, depending on the grade the job calls for.
So the first-order summary: the laser gives you one edge type, delivered instantly. The router gives you a neutral edge that can become any edge type. Everything else — geometry limits, tolerance behavior, bonding compatibility, quantity economics — follows from that.
Edge character: the variable most specs never mention
Most buyers compare these processes on speed and cost. In practice, edge character decides more jobs than either.
The laser’s as-cut edge is glossy but not optically flat — under close inspection it carries fine striations from the cutting motion, and it has a slight taper: the kerf is not perfectly square to the face, and that taper grows with material thickness. For a display component viewed at normal distances, none of this matters; a laser-cut edge is one of the six defined classifications in the Edge Finishing standard precisely because it is a legitimate finished edge for a large class of work.
Where it matters: anywhere the edge itself is the product. A thick tabletop edge meant to read like glass, a lens-like display face, a part graded for close inspection — these want a machined edge taken up through buff or diamond polishing. Polishing operations are designed to work on machined surfaces; the router’s edge is the on-ramp to the high grades, and the laser’s edge is not.
Why a laser edge is the wrong face to solvent-bond
There is a second, less visible consequence of cutting with heat. The melt-and-resolidify cycle at the cut line leaves locked-in stress in the material at the edge — the acrylic cooled faster than it could relax. That stress sits there harmlessly until a solvent touches it. Solvent cement, the basis of nearly all high-clarity acrylic joinery, attacks stressed acrylic differently than relaxed acrylic: the result is crazing — a haze of micro-fractures blooming along the bond line, exactly where the joint was supposed to disappear.
This is why a fabrication drawing that specifies “laser cut” on a part that gets bonded is quietly specifying a defect. In our shop, a face that will be solvent-bonded gets stress-free preparation chosen per joint — a sanded or machined bonding surface, prepared for the specific joint it is going into — rather than an as-cut laser edge. The joint outcomes we are protecting are defined in our Joint Clarity standard; the preparation exists to make those outcomes repeatable.
The practical takeaway for anyone writing a spec: call out the finished result you need — the edge grade, the joint clarity class — and let the process be chosen to produce it. A part can be laser-cut for its profile and still get machined or sanded preparation on the one face that gets bonded. That is normal, and it is exactly the kind of per-feature decision a spec written around a machine name prevents.
Routing by geometry
With edge character understood, geometry sorts most features quickly.
Toward the laser:
- Intricate interior cutouts and fine text. The laser’s kerf is far narrower than any practical router tool, and there is no tool to break. Lettering, logos, perforation patterns, and delicate internal webs that would be fragile or impossible under a spinning tool are routine laser work.
- Tight nesting. A narrow kerf means parts can sit close together on the sheet, which raises sheet yield — one of the honest cost drivers on short-run flat work.
- Flat parts whose as-cut edge is the finished edge. If the laser’s glossy edge meets the grade the job calls for, the part comes off the machine done.
Toward the router:
- Anything three-dimensional. Pockets, rabbets, steps, and bevels are tool-path operations; a laser cuts through, a router cuts into.
- Drilled and countersunk holes. Hardware-quality holes — sized for fasteners, countersunk to sit flush — are machining operations.
- Thick sections. Laser cutting is most effective on thinner acrylic stock, and the edge taper that comes with the process grows as thickness increases. As parts get thicker, the router’s square, taper-free cut takes over — both for accuracy and because thick edges are usually the ones headed for polishing anyway.
- Edges destined for high finish grades or bonding, for the reasons above.
Notice that these lists sort features, not parts. A retail display panel might have laser-cut interior lettering, router-machined mounting holes, and a diamond-polished front edge. Nothing about that is exotic — it is Tuesday.
Tolerance and thickness behavior
Both processes hold defined, published bands in our Fabrication Tolerances standard: laser-cut features at approximately ±1/32″ to ±1/64″, and CNC-routed features at approximately ±1/32″. On paper those look nearly interchangeable, and for flat profile accuracy in typical thicknesses they largely are — the laser tends toward the tighter end of its band on fine features in thin stock.
The difference that the table cannot show is the shape of the cut through the thickness. The laser’s slight kerf taper means the dimension at the top face and the dimension at the bottom face are not identical, and the difference grows with thickness. A router cut is square through the full section. For most work this is academic. For press-fit assemblies, mating slots, and tall parts where a square edge carries the fit, it is decisive: the router’s square wall is what makes the fit repeatable, and this is one of the quiet reasons thick, fitted work migrates to the CNC side regardless of what the flat-pattern geometry might suggest.
If a dimension on your drawing carries a fit, flag it. A tolerance band on a print tells us how accurate a feature must be; a note about what mates with it tells us which process — and which face of the cut — that accuracy has to live on.
Quantity changes the answer
The last routing variable is how many you need — now and over the life of the program.
The laser’s economics favor the short run: there is no tooling and no fixturing to build, so the first part costs roughly what the fiftieth does. For prototypes, one-off displays, and short runs of flat parts, that is hard to beat.
The router’s economics run the other way. Fixturing takes time to build once — and then pays for itself on every subsequent part. On repeat production, a fixtured CNC setup is what makes the fiftieth part match the first: the same registration, the same tool paths, the same edges, run after run. For B2B programs that reorder — retail display programs, recurring component work — that repeatability is usually worth more than any single-run cost comparison, and it is why recurring work tends to earn fixturing even when the first release could have been lasered.
And again: real production parts frequently run both processes in sequence. Laser the profile and interior details, then fixture on the router for holes and pockets, then finish edges to grade. The machines are stations in a process, not rival philosophies.
Spec the outcome, and the machine picks itself
If you take one thing from this comparison, take the framing: CNC routing versus laser cutting is not a decision you should have to make, because it is not one decision — it is a handful of per-feature decisions about edge grade, joint preparation, fit, geometry, and quantity. A spec that states those outcomes in measurable terms — this edge finished to this classification, this dimension held to this band, this face prepared for bonding — lets the shop route every feature to the process that serves it.
That is what the standards vocabulary is for. Put the outcomes on the drawing, and send it over — we will tell you exactly how each feature will be cut, and why.