Ask three fabricators for a “polished edge” and you can get three different parts back, all of them defensible. That is not dishonesty — it is a vocabulary problem. Flame, buff, and diamond polishing are separate processes that melt, abrade, or shear material in fundamentally different ways, and each leaves a physically distinct edge. Choosing among them by which sounds highest-end is how a bonding face ends up crazed and a straight sightline ends up softly rounded. Choosing among them by what the edge has to do is how you get the part you drew.
Six named edge conditions, three of them polishes
Our Acrylic Edge Finishing Standards define six edge classifications: Raw / Saw-Cut, Sanded, Laser-Cut, Flame-Polished, Buff-Polished, and Diamond-Polished. That page is the definition source — it is where each classification is described and where a drawing should point when it calls out an edge. This article does something narrower: it compares the three polishing routes inside that set as processes, so you can tell which named classification is worth specifying on which edge.
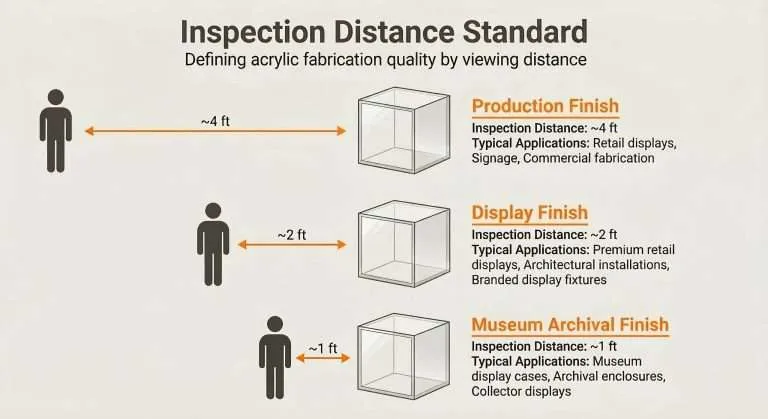
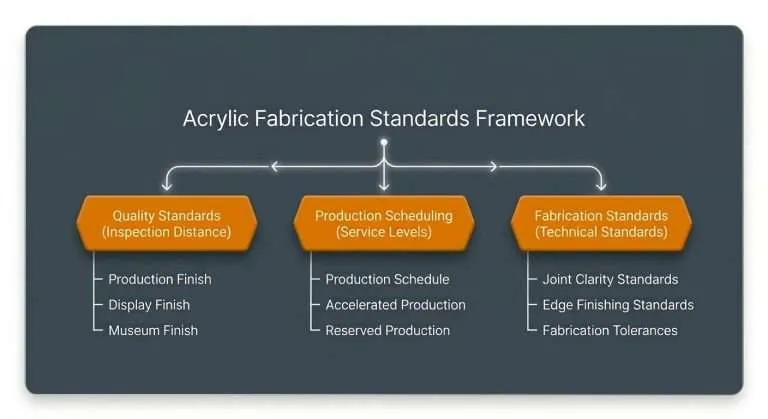
Worth separating two vocabularies that get mixed constantly. Edge Finishing names the method applied to an edge. The Acrylic Quality Standards grade the finished piece — Production, Display, or Museum Archival — by Inspection Distance: the distance at which the work must show no visible cosmetic defects, published as approximately 4 feet, 2 feet, and 1 foot respectively. A part can be Display grade with a sanded edge, because the grade describes how the piece reads at its viewing distance while the method describes what that particular edge has to accomplish. Two specs, two jobs — and both belong on the drawing.
Before polishing: the edge you start from
Raw / saw-cut
A saw leaves a matte, slightly ridged face with visible machining marks. In the standard this is a finished classification, not a defect — on edges that live inside a joint or a structural assembly, there is no reason to pay for cosmetic work nobody will see. It is also the entry point into every polishing route below.
Laser-cut
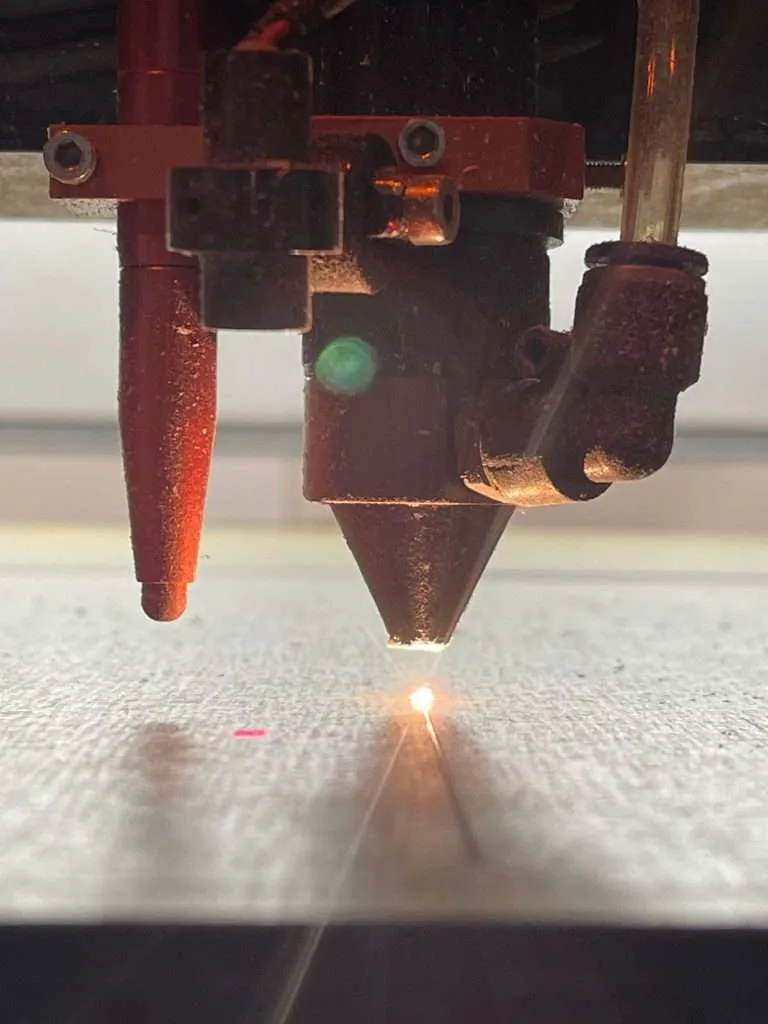
A laser does not cut acrylic so much as vaporize a path through it, and the molten margin it leaves behind self-smooths as it cools — so a laser-cut edge comes off the machine glossy, with no secondary finishing at all. Two thermal signatures come with that. The beam is a focused cone rather than a cylinder, so the edge carries a slight taper that grows with material thickness, which is why the classification is most at home on thinner stock and fine detail. And because the gloss was produced by heat, a laser-cut edge carries the same caution as a flame-polished one: it is not the right face to solvent-bond, for reasons the next section makes concrete.
Sanded
A sanded edge is smoothed with progressively finer abrasives to a uniform matte — and it is the one non-glossy finish people chronically under-specify. It does three jobs a polished edge does badly. It gives solvent and UV adhesives a flat, uniform, low-stress seat — which is what the joint wants — and that produces stronger and more consistent bonds. It scatters light evenly, softening hot spots in edge-lit and back-lit builds. And it reads as a deliberate non-glare detail where a mirror-clear edge would pull attention. On most real assemblies the right answer is not one method — it is sanding the edges that bond or diffuse and polishing the edges that are seen.
Flame polishing: gloss in a single pass
A controlled flame passes across the cut edge and re-melts the surface, which flows out smooth and clear as it sets. It is fast and economical per unit, and on straight line-of-sight edges in display, fixture, signage, and panel work it produces a clean gloss that carries the part. Where per-unit finishing time matters — high-volume runs above all — that speed is often what makes a program viable.
The honest limits follow directly from the mechanism. Re-melted material flows, so the edge softens slightly rather than holding a knife-crisp arris. The surface is glossy but not held dead-flat the way a machined face is, and that gap widens with thickness — a heavy edge that must read like glass is not flame work. Some unit-to-unit variation is inherent to a hand-guided heat process, which is why the Quality Standards explicitly list slight variation in flame-polished edges as acceptable at Production grade — the standard prices the method’s nature in, rather than pretending a torch behaves like a machine tool.
The trap: never flame-polish a face you intend to bond
This is the failure that costs real money, because it shows up after assembly rather than at the finishing station. The flame heats a thin skin of the edge past its softening point while the material behind stays cool; as that skin re-solidifies against a rigid backing, it is left in tension — locked-in stress the part now carries invisibly. A stressed acrylic surface will sit there indefinitely, until a solvent arrives. Solvent-bonding cement works by temporarily softening the surfaces it joins, and on a stressed surface that softening lets the locked-in tension release the only way it can: by opening a web of micro-cracks. That is crazing, and it blooms exactly where the solvent went — along the joint line, in the most visible place on the part.
So the rule is directional, and the direction matters. A flame pass after an edge is bonded is a legitimate operation — unlike diamond polishing, a torch can reach an edge on an already-assembled piece — with one practical caution: keep the torch off the joint line itself, because residual solvent plus heat produces bubbles. A flame pass before bonding sets the trap. Which stress-free prep replaces it depends on what the joint has to do: where the joint is structural, sand the face — a flat, uniform, low-stress seat is what the joint wants anyway; where the joint itself must read seamless, diamond-polish that face before assembly and specify the result against the Joint Clarity Standards. Sequence is the whole question.
Buff polishing: control across thickness and shape
Buff polishing is mechanical and multi-stage: the edge is machined, then progressively refined against rotating buffing wheels with abrasive compounds until it comes up clear and glossy. Nothing is melted, so nothing is stressed — which is precisely why it is the method of choice on thicker stock where a heat polish would risk crazing, and on parts where a stress-free edge matters downstream.
Two things make it worth specifying over flame. First, edge-profile control: because material is abraded rather than reflowed, the edge keeps the geometry that was cut, so corners stay closer to what the drawing shows. Second, reach: buffing follows contoured and shaped edges that a straight machining pass cannot enter — curves, radii, and profiled work where diamond polishing has no line of approach. Being machine-driven, it also holds an edge consistent from the first unit of a long run to the last, which is why it is the natural route when a program is specified at Display grade and the edges are part of what a customer sees at 2 feet.
The trade is labor. Multiple progressive stages mean more hands-on time per linear inch than a flame pass, and that is a genuine cost factor on high-count runs. Heat discipline matters too: friction generates heat, and thin parts have less mass to absorb it, so thin stock is where a buffing operation needs the most control.
Diamond polishing: optical flatness on straight edges
A precision diamond-tipped cutter shears the edge to an optically flat, transparent face in a controlled, repeatable machine pass. No flame, no hand variation — the face it leaves is the flattest and clearest acrylic can hold. This is the edge you look into rather than at: thick blocks, bases, awards, presentation enclosures, and case work where the edge is meant to disappear. It is also the best choice for edge-lit work, because a flatter, clearer entry face transmits light more evenly, and for faces that will be solvent-bonded into a genuinely seamless joint — machining leaves the face flat, square, and stress-free, which is everything a high-clarity bond needs from its two halves.
Its first constraint is geometry: a diamond pass needs a straight path to traverse, so contoured and shaped edges fall to buffing instead. Its second constraint is sequence: diamond polishing happens on flat parts before they are bonded, and cannot be added to an assembled piece afterward. If an edge needs the diamond-polished classification, that decision belongs at the spec stage — not at final inspection.
The comparison, compressed
| Method | Mechanism | Where it wins | What to watch |
|---|---|---|---|
| Sanded | Progressively finer abrasives; uniform matte | Bonding faces, light diffusion, deliberate non-glare detail | Not a show edge — specify it for function |
| Flame | Re-melts the surface so it flows glossy | Straight sightline edges at volume; edges on already-bonded work | Slight rounding, some unit variation, induced stress — never on a face to be bonded |
| Buff | Machined, then refined on abrasive wheels | Thicker stock, contoured and shaped edges, run-to-run consistency | Labor per linear inch; heat discipline on thin parts |
| Diamond | Diamond cutter shears the face optically flat | Straight display edges, thick sections, edge-lit faces, seamless joints | Straight geometry only; must precede bonding |
Matching method to grade
The Edge Finishing standard itself sketches the typical pairings: Production-grade projects commonly run flame-polished or sanded edges, Display-grade work tends to incorporate buff-polished edges, and Museum Archival projects often require diamond-polished ones. That gradient is not arbitrary — it tracks the inspection distances. At 4 feet, flame’s slight rounding and unit variation are invisible; at 2 feet, buff’s geometry control starts paying for itself; at 1 foot, only a machined face reliably survives scrutiny.
But the pairing is a starting point, not a rule, because the grade judges the whole piece at its distance while methods are chosen edge by edge. A Display-grade case can honestly carry a flame-polished front edge and a sanded bonding face on the same joint. What the grade changes is how much room each edge has: as the Inspection Distance closes, each edge’s geometry and sightline narrow which methods can serve it. That is spec-stage work, not an argument at final inspection.
Specify the method per edge, not per part
The single most useful habit we see from experienced buyers is deceptively small: they call out the edge method on the drawing, edge by edge, rather than writing “polished” once in a notes block. A display case might carry diamond-polished front verticals, sanded bonding faces at every joint, saw-cut hidden edges on the base, and a flame-polished back edge nobody will study — the kind of mixed-method part that fills our project gallery. Four named classifications on one part, each chosen for what that edge does — and it costs less than finishing everything to the highest level.
It also settles the argument before it happens. A named classification from the Edge Finishing Standards is a criterion a fabricator can be held to and inspected against; “polished” is an opinion, and opinions get resolved after the parts arrive — the expensive place to resolve anything. If you would rather not carry the specification yourself, describe what each edge has to do — bond, diffuse, disappear, or simply be clean — and we will map it to a named classification before tooling.
Dates are specified the same way, separately from finish — and since the labor-intensive edge routes consume more of the capacity a date depends on, it is worth knowing that only Reserved Production, of the three tiers defined on the Production Scheduling page, guarantees a specific ship date.
If you have a part where the edges are doing more than one job, send us the drawing or just the concept along with where each edge will be seen. We will come back with a named method per edge, the grade it should be held to, and a production tier.