Most lobby sign projects arrive the same way: a logo file attached to an email, and a phone photo of the wall behind reception. Between those two things and an installed sign sit six decisions, and the projects that go smoothly are the ones where the buyer makes them in order — because each decision constrains the next. Size determines construction options. Construction determines color strategy. Mounting determines what we need to know about the wall. This post walks the whole sequence, so the specification you send with your quote request is the one fabrication can actually build from.
First, the file itself
Before any of the six decisions, look at what you actually have. For cut letters and crisp large-format print, the artwork needs to be vector — AI, EPS, or SVG. A vector file describes the logo as mathematical curves, so it scales to a 6-foot reception wall exactly as cleanly as it renders on a business card, and it gives the cutting path a true outline to follow.
If all that exists is a low-resolution PNG pulled from a website header, the project doesn’t stop — but it gains a step. The logo gets redrawn as vector artwork before anything is cut or printed, and that redraw appears on your proof for approval like everything else. Worth knowing up front: if your brand team has the original vector file, sending it with the quote request removes that step entirely.
Brand color: we produce it with color-managed CMYK printing matched to the customer’s brand references, and you approve it on a proof before fabrication. If color accuracy is critical — and for a sign that carries your brand at the front door, it is — the proof stage is where that gets locked, not the install.
The six decisions, in order
1. Size the sign for the wall and the viewing distance
Lobby signs get sized two ways, and both matter. The wall sets the proportional ceiling: a sign that dominates the reception wall crowds it, and one that’s too small reads as an afterthought — the sign should hold the wall’s center without fighting its edges. Tape out the candidate footprint on the actual wall, or mark it up on the site photo to scale, before you commit.
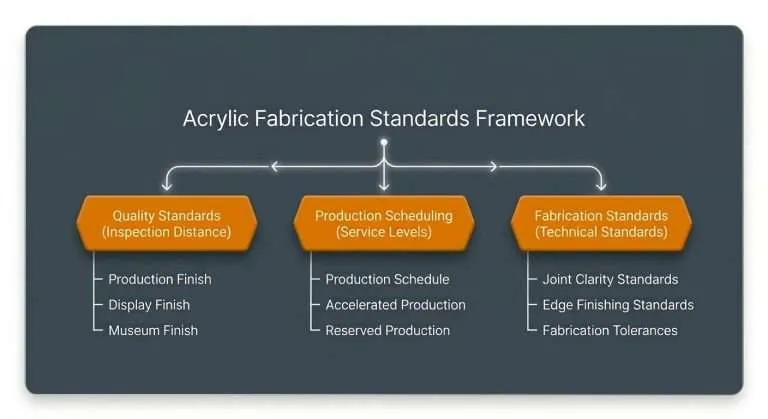
Viewing distance sets the quality requirement, and this is where lobby signage differs from most other sign types. A monument sign is read from a moving car; a reception sign is read by a visitor standing at the desk, close enough to see the edges and the surface. Our quality grades are defined by Inspection Distance — the distance at which the piece must appear flawless — and the published grades put Production Finish at approximately 4 feet, Display Finish at approximately 2 feet, and Museum Archival Finish at approximately 1 foot. A reception sign lives at Display Finish distances: visitors wait beside it, lean on the desk next to it, and photograph it behind the person greeting them. Specify accordingly, and say so in the quote request — a measurable grade name does more work than any adjective.
2. Choose the construction
Three constructions cover nearly every good lobby sign:
- Flat printed panel: a single acrylic panel, direct-printed with the full logo and mounted on standoffs. The most economical construction in material and labor terms, and the right call for detailed multi-color marks that can’t be cut as letters. Printing on the second surface — the back of a clear panel — puts the acrylic itself between the ink and the world, which gives the graphic depth and protects it from cleaning and contact.
- Dimensional letters: each letter cut individually from acrylic — thickness chosen for the letter height and the presence you want — and mounted directly to the wall or to a backer. Maximum presence, real shadows, and the construction most people picture when they picture a corporate lobby.
- Layered panel plus letters: a back panel — frosted, painted second-surface, or printed — with a standoff-mounted face panel or dimensional letters floating in front of it.
The layered construction dominates well-executed lobbies, and the reason is the shadow gap. When the face layer floats off the back panel on standoff barrels, it casts a soft, real shadow that shifts as the viewer moves and as the lobby’s light changes through the day. That shadow is what makes the sign read as an object rather than a graphic — it’s doing more visual work than any printed effect can, because it’s actual depth, not simulated depth. The assembly detail matters: mounting holes are drilled with proper edge distance and the layers are registered to each other so the gap stays uniform, because a shadow gap that wanders is more visible than no gap at all.
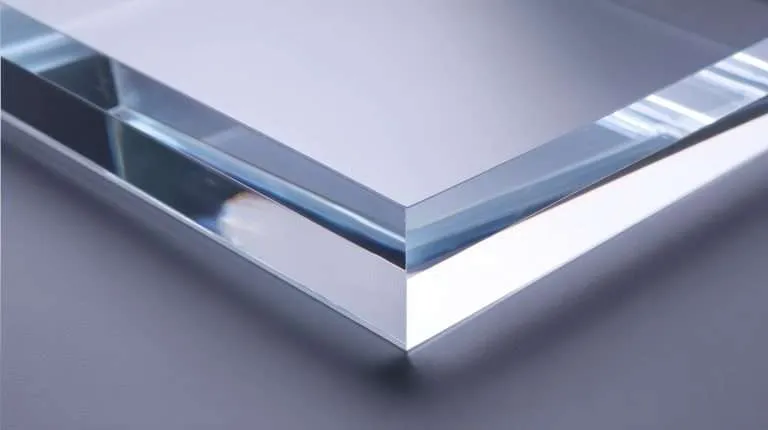
At reception viewing distances, edges are part of the design. Every visible edge on a cut letter or a floating panel gets seen at arm’s length, so the edge treatment should be specified, not left to default. Our Edge Finishing classifications make this a one-line spec: for Display Finish work, buff-polished edges are the common pairing.
3. Set the color strategy
Color on a lobby sign comes from more places than print. Frosted acrylic reads as a soft, expensive neutral and hides fingerprints. Painted second-surface color gives a deep, glass-like solid. Direct print handles gradients and multi-color marks. Many of the best layered signs combine them — a frosted back panel with printed or painted letters in front — so decide which layer carries the brand color and which layers stay neutral. Whatever carries it, the standard is the same: color-managed CMYK printing matched to your brand references, proof-approved.
4. Decide on illumination — early, not late
Most reception signs are unlit and look better for it, provided the lobby’s own lighting is decent. But if you want halo-lit letters or an edge-lit panel, that decision has to come now, because it changes everything downstream: letter depth and construction, power at the wall, and the mounting system. Illuminated signs are built to the lighting spec — bring that spec to the quote conversation rather than retrofitting it after the design is set. If the electrical isn’t in the wall yet, this is also the decision that determines whether a trade needs to get there before the sign does.
5. Choose the mounting
For panels, standoff hardware is the default and deserves its reputation: the barrel-and-cap assembly holds the panel off the wall, creates the shadow gap, and makes the hardware part of the design language. Standoffs come in a range of barrel lengths and finishes — satin metal finishes are the safe choice against most walls — and the panel is drilled to match during fabrication, which is why the mounting decision belongs in the spec, not the install. Dimensional letters mount either with concealed pad-and-adhesive systems, or on projecting studs set into a drilling template we supply so the installer’s holes land exactly where the letters expect them.
6. Answer the wall question
This is the decision buyers most often skip, and the one installers most wish they wouldn’t. What the wall is made of determines the fastening system, and sometimes the construction itself:
- Drywall: fine for lighter panels with appropriate anchors, but heavier assemblies want to land on blocking or studs. If the wall is still open or being built, ask the contractor to add blocking where the sign will hang — it’s trivial now and impossible later.
- Glass walls: you don’t drill them. Glass-mounted signs use clamping standoff systems that grip the panel edge, or mount to adjacent structure instead. This changes the hardware entirely, so it has to be known at spec time.
- Brick, block, and concrete: absolutely mountable, with masonry anchors and the right drilling — but the installer needs to arrive knowing that, with the right bits and hardware in the kit.
The practical requirement is simple: a straight-on site photo of the wall, plus an answer to “what is this wall made of?” If the answer is “we’re not sure,” a photo of the wall’s edge or an adjacent doorway usually settles it. This information belongs in the quote request, because fabrication decisions — hole placement, hardware selection, template preparation — depend on it.
From approved proof to installed wall
Once the six decisions are made, the project runs a fixed sequence, and knowing it helps you plan backward from your date:
- Site answers in: the wall photo, wall construction, and finished artwork arrive with the quote request. Anything missing here stalls everything after it.
- Proof: you receive a proof showing the sign at size, the construction, the color treatment, and the mounting layout. Approval of this proof is what releases fabrication — which means proof turnaround is the one stage where the buyer controls the clock.
- Fabrication: cutting, printing, edge finishing, assembly, and the drilling template for the installer.
- Install: on the wall, level, with hardware matched to the wall construction answered in step one.
Here is where the scheduling conversation belongs. An office opening is not a soft target — the ribbon gets cut on a specific day whether the wall behind reception is finished or bare, and of our scheduling tiers, only Reserved Production guarantees a specific ship date. If your sign has to be on the wall for a date on a calendar, say so when you request the quote, not when you approve the proof.
A lobby sign is the one piece of fabrication every visitor, candidate, and client walks past. Specified in this order — file, size, construction, color, light, mounting, wall — it’s also one of the most predictable projects in our shop. You can see how these constructions photograph in our gallery, and when you have the logo file and the wall photo in hand, send them over and we’ll walk the six decisions with you.